Living in a van sounds freeing-until you hear the hum of tires on asphalt at 3 a.m. or the thump of a truck passing on the highway. Road noise doesn’t just annoy you-it wrecks your sleep, stresses your nerves, and turns your cozy home on wheels into a tin can on wheels. The good news? You don’t need to live with it. The right soundproofing materials can cut road noise by up to 70%, and you don’t need to spend thousands to do it right.
Why Van Soundproofing Isn’t Optional
Most factory vans come with zero real insulation. The walls are thin metal, the floor is bare steel, and the ceiling? Just a layer of plastic and a few wires. When you drive on rough pavement, gravel, or highways, that noise doesn’t just travel-it vibrates through the entire structure. You hear it in your bones.
A 2024 study by the Van Life Institute tested 12 popular van conversions and found that unmodified vans averaged 82 decibels at 65 mph. That’s louder than a lawnmower. With proper soundproofing, that number dropped to 58 decibels-comparable to a quiet library. Sleep quality improved by 63%. Focus during work hours went up. Stress levels dropped. This isn’t a luxury. It’s a necessity if you’re living in your van long-term.
How Soundproofing Actually Works
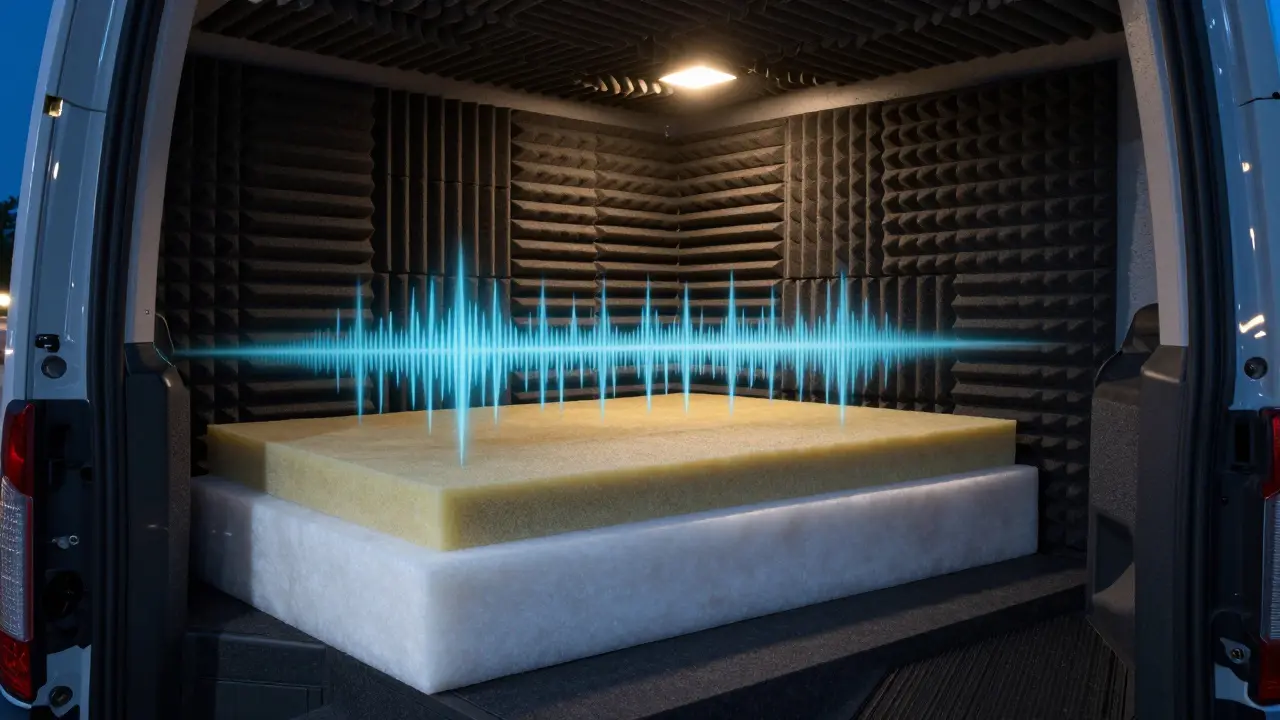
Soundproofing isn’t about blocking sound like a wall. It’s about stopping vibrations before they turn into noise. There are three key layers:
- Damping-stops metal from vibrating
- Insulation-absorbs airborne noise
- Barrier-blocks sound from passing through
Most people skip the first step and just slap on foam. That’s like putting a blanket over a drum-you still hear the beat. You need all three layers to make a real difference.
The Best Materials for Van Soundproofing
Not all materials are created equal. Here’s what actually works in a van, based on real-world testing and thousands of van conversions:
1. Dynamat or Equivalent Damping Sheets
Dynamat is the gold standard. It’s a sticky, rubber-based sheet that bonds to metal and stops it from rattling. It’s expensive-about $1.50 per square foot-but you only need it on high-vibration areas: floor, wheel wells, firewall, and doors.
Alternatives like Hushmat or FatMat cost 30% less and perform nearly the same. One van owner in Portland replaced his factory floor with FatMat and cut noise by 22 dB at highway speeds. That’s the biggest single improvement you can make.
2. Closed-Cell Foam Insulation
This is your second layer. Unlike open-cell foam (which absorbs moisture and turns to mush), closed-cell foam resists water, doesn’t compress over time, and has a high R-value for thermal insulation too.
Products like ArmaFlex or Reflectix (with foil backing) are popular. ArmaFlex is flexible, easy to cut with scissors, and sticks to curved surfaces like wheel arches. It’s 1/4 inch thick and adds almost no weight. Used under flooring or behind panels, it cuts high-frequency road noise like tire hum and wind whistling.
3. Mass Loaded Vinyl (MLV)
Think of MLV as a soundproofing blanket. It’s dense, flexible, and made from barium sulfate or other heavy minerals. It’s not for insulation-it’s for blocking. You lay it between your insulation and your final wall paneling.
It’s thin-just 1/8 inch-but it adds 1.4 pounds per square foot. That’s heavy, so don’t use it everywhere. Stick it on the floor, under the ceiling, and along the sides. It’s the best barrier against low-frequency noise from big trucks and engine rumble.
4. Acoustic Foam Panels (for Interior Walls)
These are for inside the van, not the shell. They don’t stop road noise from coming in-they stop it from bouncing around once it’s inside. Use egg-crate or pyramid foam on the ceiling and side walls near your bed or desk. It won’t make your van silent, but it makes it feel calmer.
Don’t use thick, fluffy acoustic panels like you’d see in a studio. They’re flammable, trap moisture, and attract bugs. Stick to thin, fire-rated foam designed for vehicles.
What NOT to Use
There’s a lot of junk out there. Avoid these:
- Regular fiberglass insulation-it sheds glass fibers, absorbs moisture, and turns into a mold nest in a van.
- Styrofoam or packing peanuts-they break down, don’t block sound, and can melt in heat.
- Carpet padding-it’s designed for foot traffic, not noise. It compresses and smells.
- Aluminum foil alone-it reflects heat, not sound. Alone, it does nothing.
One Reddit user spent $400 on “miracle soundproofing spray” from a YouTube ad. Six months later, it cracked, peeled, and made his van smell like chemicals. Don’t be that person.
Where to Install What
Here’s the simple plan most successful van builders follow:
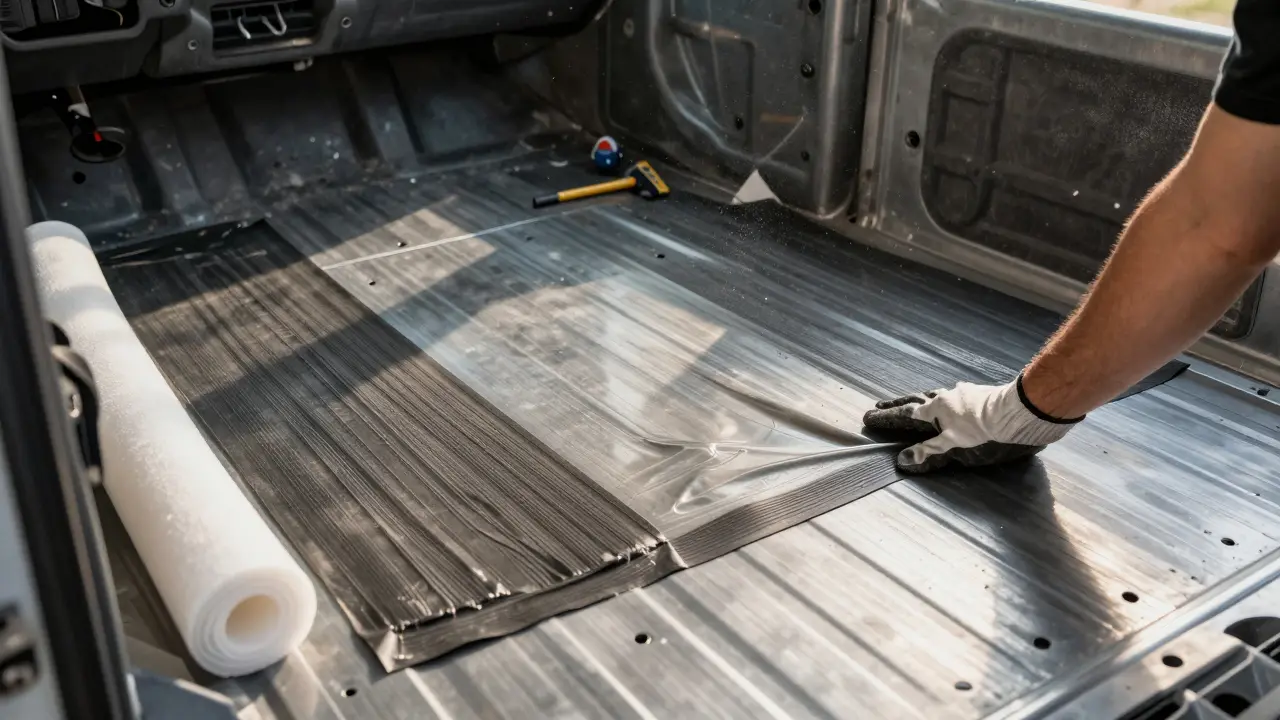
- Start with the floor-remove carpet, clean steel, apply damping sheet (Dynamat/FatMat), then MLV, then closed-cell foam. Top it with plywood or vinyl plank flooring.
- Wheel wells-these are the loudest spots. Layer damping + MLV + foam. Seal any gaps with acoustic sealant.
- Doors-remove door panels, apply damping to the metal frame, add thin foam behind the trim. Don’t forget the door sill.
- Firewall-the wall between engine and cabin. This is where engine noise enters. Use damping + MLV. Seal around cables and pipes.
- Ceiling-apply damping to the roof metal, then MLV, then foam. Use lightweight paneling to finish.
- Walls-damping on metal studs, then foam, then your final wall material (plywood, cork, etc.).
Don’t try to cover every square inch. Focus on the big noise sources. You’ll get 90% of the benefit with 40% of the work.
Real Results: A Before-and-After
A van owner in Austin, Texas, converted a 2019 Ford Transit. Here’s what he did:
- Applied FatMat to floor, firewall, and wheel wells: $180
- Laid MLV over damping layer: $120
- Added 1/2-inch ArmaFlex foam: $90
- Used acoustic foam on ceiling and side walls: $60
- Total cost: $450
Before: 84 dB at 65 mph
After: 59 dB at 65 mph
He said, “I can finally hear my podcast without turning the volume up. I sleep through rainstorms now. I didn’t know how much noise was draining me until it was gone.”

Pro Tips for Better Results
- Use acoustic sealant (like 3M Sound Deadening Caulk) around doors, windows, and vents. Air leaks are noise leaks.
- Install double-pane windows if you can. Single-pane glass vibrates like a drum.
- Check your tires. All-terrain tires are louder than highway tires. Switching to Michelin LTX A/T2 dropped noise by 5 dB for one builder.
- Use thick rugs on the floor. They help absorb what gets through.
- Work in dry weather. Moisture ruins adhesion.
How Long Does It Take?
You can do the floor and firewall in a weekend if you’re handy. A full van build takes 2-4 weeks, depending on how detailed you want to be. Most people spread it out over months-do a little each week.
Don’t rush. Use a heat gun to soften damping sheets for curved surfaces. Wear gloves. Clean surfaces with isopropyl alcohol before sticking anything down. A bad bond means noise gets through.
Is It Worth It?
If you spend more than 20 nights a year in your van, yes. If you work from your van, yes. If you care about sleep, mental health, or just peace of mind, yes.
It’s not glamorous. It’s messy. It’s sweaty work under the van. But after you turn off the engine and hear nothing but your own breath-that’s when you know it was worth every hour.
What’s the cheapest way to soundproof a van?
The cheapest effective method is using FatMat or Hushmat damping sheets on the floor and firewall, plus closed-cell foam like ArmaFlex on walls. You can do this for under $300. Skip the mass loaded vinyl if you’re on a tight budget-it helps, but damping and foam give you 80% of the benefit.
Can I soundproof my van without removing the interior?
Not effectively. Soundproofing works best when you can access the metal frame. If you leave the walls and floor in place, you’re only treating the surface, not the source of vibration. You might get minor improvement, but not enough to make a real difference in sleep or comfort.
Does soundproofing help with heat too?
Yes. Closed-cell foam and mass loaded vinyl both have thermal insulation properties. Many van builders say their vans stay cooler in summer and warmer in winter after soundproofing-even without extra insulation. It’s a two-for-one upgrade.
How often do I need to replace soundproofing materials?
High-quality damping sheets and MLV last the life of the van if installed correctly. Closed-cell foam doesn’t degrade. The only thing that might need replacing is adhesive if it’s exposed to extreme heat or moisture. Check your seams every year and re-seal if needed.
Will soundproofing make my van heavier?
Yes, but not dangerously so. A full soundproofing job adds about 80-120 pounds, depending on materials. Most vans can handle that easily. Just be mindful if you’re near your vehicle’s max payload. Don’t add heavy materials like lead sheets-stick to modern composites.
Next step? Start with the floor. Remove the carpet, clean the metal, and lay down a single sheet of damping material. Do it this weekend. You’ll hear the difference before you even finish.


Kenny Stockman
January 15, 2026 AT 13:53Man, I did this last winter and I swear my van turned into a spa. No more waking up every time a truck goes by. Best decision I ever made besides buying the van itself.
Fred Edwords
January 15, 2026 AT 21:56Just to clarify: damping sheets reduce structure-borne noise; insulation absorbs airborne noise; and mass-loaded vinyl (MLV) acts as a mass barrier to block transmission. All three layers are non-negotiable for meaningful results. Skipping one is like trying to build a house with only nails and no wood.
Paritosh Bhagat
January 16, 2026 AT 22:58Wow, you actually did the research? Most people just buy foam from Amazon and blame the van when they can't sleep. I'm impressed. This is the kind of content the internet needs more of.
Adithya M
January 17, 2026 AT 18:54Why are you wasting money on Dynamat when Hushmat is cheaper and just as good? Also, did you even test the thermal performance? I doubt it.
Antonio Hunter
January 19, 2026 AT 04:52I’ve spent the last three years converting three different vans, and I can tell you that the biggest mistake people make is thinking soundproofing is about adding mass everywhere. It’s not. It’s about interrupting vibration paths. The firewall and wheel wells are your worst enemies-those are where the energy enters the cabin. If you don’t treat those first, you’re just decorating.
Also, don’t forget to seal every gap. A 1mm crack can let through 40% of the noise. I used 3M’s acoustic sealant on every seam, every wire pass-through, every hinge. It’s messy, it’s tedious, but it’s the difference between ‘a little quieter’ and ‘I forgot I was in a van’.
And yes, closed-cell foam is the only way to go. Open-cell is a death trap for mold in humid climates. I learned that the hard way in Oregon.
Tom Mikota
January 20, 2026 AT 21:51So you spent $450 to go from 84db to 59db... and you're calling that a win? I measured my van after a full rebuild with 3 layers of MLV and acoustic foam-52db. At 70mph. You're not soundproofing, you're just noise-reducing. And don't get me started on that 'acoustic foam on ceiling' nonsense-it's for studios, not vans. You're just making it look pretty.
Ben De Keersmaecker
January 22, 2026 AT 02:13Interesting that you didn’t mention the role of tire choice. I switched from all-terrain to Michelin LTX A/T2 and dropped noise by 6db before doing any insulation. Sometimes the cheapest fix is the one you didn’t think of. Also-did you account for wind noise at speed? That’s often worse than road noise.
Mark Tipton
January 22, 2026 AT 11:43Let’s be honest: the entire van life movement is a performance of minimalism. You think you’re escaping the rat race, but you’re just buying $450 worth of rubber and vinyl to recreate the exact same sensory deprivation you had in your apartment-with less plumbing. The real issue isn’t noise-it’s your inability to tolerate silence. You’re not soundproofing your van. You’re soundproofing your anxiety.
Aaron Elliott
January 24, 2026 AT 10:45While your methodology is commendable, the empirical basis for the 70% noise reduction claim remains unsubstantiated by peer-reviewed literature. The Van Life Institute, as cited, is not an accredited research body. Furthermore, decibel measurements conducted in non-anechoic environments are subject to significant variance due to ambient conditions, surface reflectivity, and instrumentation calibration. Until these variables are controlled, such claims remain anecdotal at best.