
Car Maintenance Schedule Calculator
Your Maintenance Schedule
Estimated next maintenance:
Based on vehicle conditions and manufacturer recommendations
When you start working on a vehicle, Car Parts are the individual components that make up a automobile’s mechanical, electrical and structural systems. Knowing how each part functions, when it needs service, and the simplest way to replace it can save you time and money. This guide walks you through the most common categories, the tools you’ll need, step‑by‑step replacements, and a maintenance checklist that any DIY mechanic can follow.
Understanding the Main Car Parts Groups
Cars are built from a handful of major systems. Each system contains several car parts that work together. Below is a quick rundown of the six core groups you’ll encounter most often.
- Engine: Generates power by burning fuel. Key sub‑parts include pistons, camshaft, and timing belt.
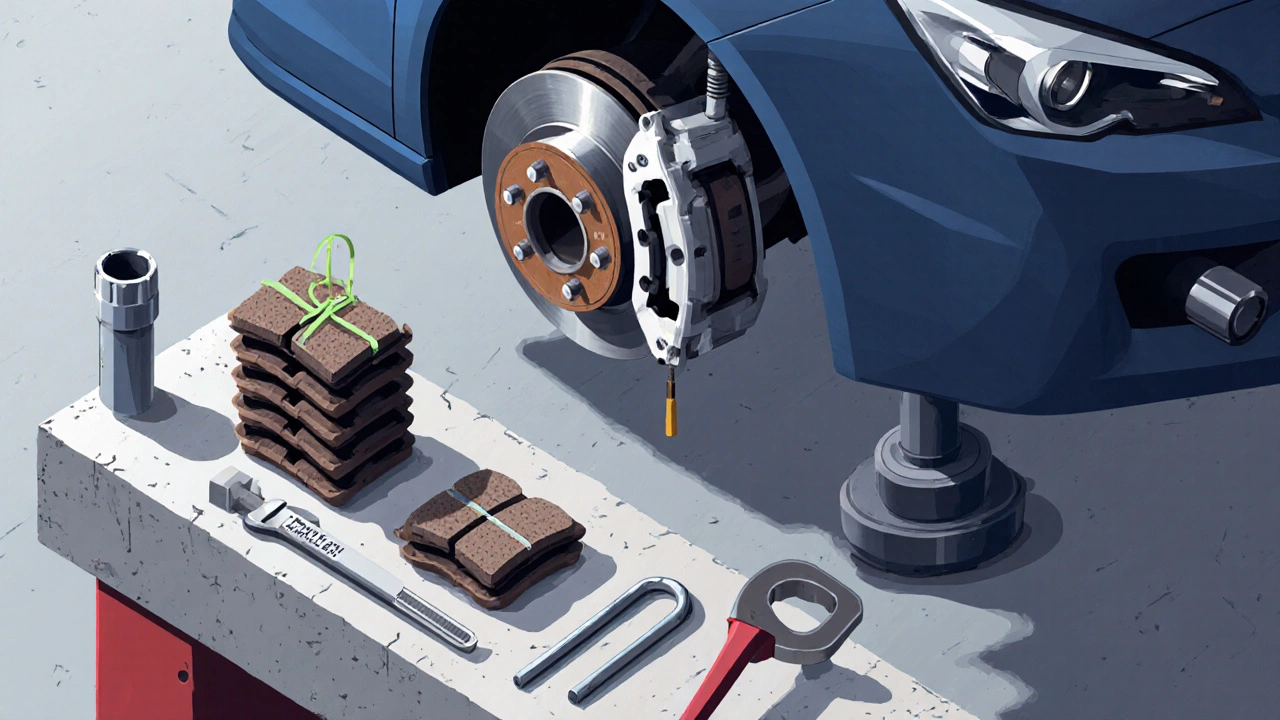
- Brake System: Stops the car when you press the pedal. Main components are brake pads, rotors, calipers and master cylinder.
- Transmission: Transfers engine torque to the wheels. Includes the clutch (manual) or torque converter (automatic), gear sets, and fluid.
- Suspension: Keeps wheels in contact with the road and smooths out bumps. Consists of shocks, struts, springs, and control arms.
- Electrical System: Powers lights, infotainment, and engine management. Core parts are battery, alternator, starter, and wiring harness.
- Consumables: Items like oil filter, air filter, spark plug, and fuel pump that need regular replacement.
Essential Tools for the DIY Mechanic
Before you dive into any repair, gather these basics. You don’t need a full garage, just a reliable starter kit.
- Socket set (metric & SAE) - 3/8" and 1/2" drive.
- Torque wrench - ensures bolts are tightened to manufacturer specs.
- Jack and jack stands - safety first when lifting the car.
- Brake line wrench and bleed kit - for brake work.
- Compression tester - checks engine health.
- Multimeter - diagnostics for the electrical system.
- Shop rags, hand cleaner, and silicone spray - keep things tidy.
Investing in good quality tools pays off after the first few jobs; they’ll last decades.
Step‑by‑Step: Replacing the Most Common DIY Parts
The following sections describe five high‑frequency replacements. Each tutorial includes safety tips, required tools, and a concise procedure.
1. Brake Pads & Rotors
- Safety: Lock the wheels, wear gloves, and support the car on jack stands.
- Tools: 12 mm socket, brake caliper tool, C‑clamp, torque wrench.
- Procedure:
- Remove the wheel and locate the caliper bolts.
- Slide the caliper off; suspend it with a zip tie to avoid strain on the brake line.
- Push the piston back using the C‑clamp - this creates room for the new pads.
- Take out the old pads and any retaining clips.
- If rotors are scored or below the minimum thickness, remove them with a lug nut remover and replace.
- Install new pads, re‑align the caliper, and torque bolts to the spec (usually 90 Nm).
- Bleed the brake system if air entered while the caliper was off.
2. Oil Filter & Engine Oil
- Safety: Warm the engine for easier flow, then shut it off and let it sit 5 minutes.
- Tools: Oil drain pan, 3/8" oil filter wrench, funnel, torque wrench.
- Procedure:
- Place the drain pan under the oil pan and remove the drain plug.
- Let the old oil fully drain (about 5 minutes).
- Unscrew the old filter; be prepared for residual oil.
- Lubricate the rubber seal of the new filter with a bit of fresh oil and screw it on hand‑tight, then give it a ¾ turn.
- Replace the drain plug, torque to spec (usually 30 Nm).
- Fill the engine with the recommended oil type and volume (check the owner’s manual).
- Check the dipstick after a minute to confirm level.
3. Spark Plugs
- Safety: Disconnect the battery to avoid accidental sparks.
- Tools: Spark plug socket, torque wrench, gap gauge.
- Procedure:
- Remove the ignition coil or spark plug wire for each plug.
- Unscrew the old plug with the socket.
- Check the new plug’s gap with a gauge; adjust if needed.
- Hand‑tight the plug, then torque to the manufacturer’s spec (usually 20 Nm).
- Reconnect the coil or wire and repeat for all cylinders.
4. Battery Replacement
- Safety: Wear safety glasses; batteries emit hydrogen gas.
- Tools: Wrench set, battery terminal puller, silicone grease.
- Procedure:
- Turn off the ignition and remove any accessories that draw power.
- Disconnect the negative (black) terminal first, then the positive (red).
- Lift the battery out of its tray - they can weigh 30‑40 lb.
- Clean the tray and terminals with a wire brush.
- Place the new battery, apply a thin coat of silicone grease to the terminals, and reconnect - positive first, then negative.
- Secure the battery bracket and test the voltage (should read ~12.6 V).
5. Air Filter
- Safety: No special precautions; quick task.
- Tools: None required in most modern cars.
- Procedure:
- Open the engine compartment and locate the air filter box.
- Release the clips or screws holding the box cover.
- Remove the old filter; note the orientation.
- Insert the new filter making sure it sits snugly.
- Re‑close the box and secure the fasteners.
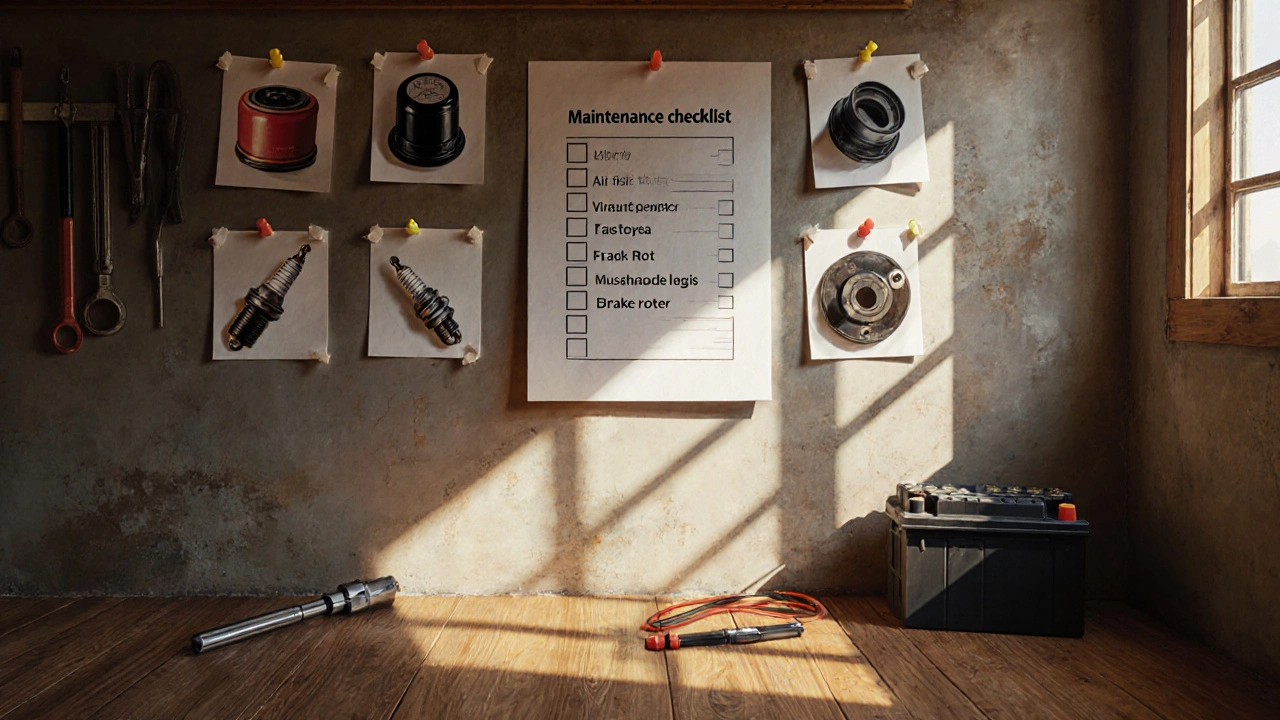
Maintenance Checklist for DIY Mechanics
Keep this table on your garage wall. It outlines the typical service intervals for the most common consumables and the tools you’ll need for each job.
| Part | Typical Interval | Average Cost (USD) | Key Tools |
|---|---|---|---|
| Oil Filter | Every oil change (5,000‑7,500 mi) | 8‑15 | Oil filter wrench, drain pan |
| Air Filter | 15,000‑30,000 mi | 10‑20 | None (hand) |
| Brake Pads | 30,000‑70,000 mi | 40‑120 per axle | Socket set, caliper tool |
| Brake Rotors | 70,000‑100,000 mi | 70‑200 per axle | Socket set, impact driver |
| Spark Plugs | 30,000‑100,000 mi (depends on type) | 2‑6 each | Spark plug socket, gap gauge |
| Battery | 3‑5 years | 80‑150 | Wrench set, terminal puller |
| Timing Belt | 60,000‑100,000 mi | 150‑300 | Locking tool, torque wrench |
Sourcing Quality Parts Without Overpaying
Finding reliable parts is as important as the installation itself. Here are three proven strategies:
- OEM vs. Aftermarket: Original Equipment Manufacturer (OEM) parts guarantee exact fit, but reputable aftermarket brands often match quality at a lower price. Look for certifications like ASE or ISO.
- Online marketplaces: Websites such as RockAuto, PartsGeek, and eBay Motors let you compare prices across vendors. Filter by “new” and check seller ratings before buying.
- Local salvage yards: For components like alternators, fuel pumps, or suspension arms, a reputable junkyard can provide a refurbished part for 30‑50% of the new price. Verify the part’s mileage and request a short warranty.
Always keep the part’s part number (often found on the old component) handy; it eliminates guesswork and ensures you order the exact match.
Common Pitfalls and How to Avoid Them
Even seasoned DIYers trip over a few traps. Spot them early and you’ll stay safe and save money.
- Skipping the torque spec: Overtightening can strip threads; undertightening can let bolts loosen. Use a torque wrench every time. \n
- Forgetting to disconnect the battery: Especially when working on the electrical system. A stray spark can damage electronics or cause a fire.
- Using the wrong fluid: Engine oil, transmission fluid, and brake fluid each have distinct properties. Mixing them can destroy seals.
- Neglecting to bleed air: After brake or clutch work, air bubbles cause spongy pedal feel. A simple bleed kit solves it.
- Reusing old gaskets: Gasket material deforms over time. Always replace with a fresh one to prevent leaks.
When to Call a Professional
DIY is rewarding, but some jobs are best left to the shop. If you encounter any of the following, consider a professional:
- Timing belt or chain replacement on interference engines - a missed tooth can bend valves.
- Transmission rebuilds - require specialized tools and precise calibrations.
- Airbag system work - only certified technicians should touch SRS components.
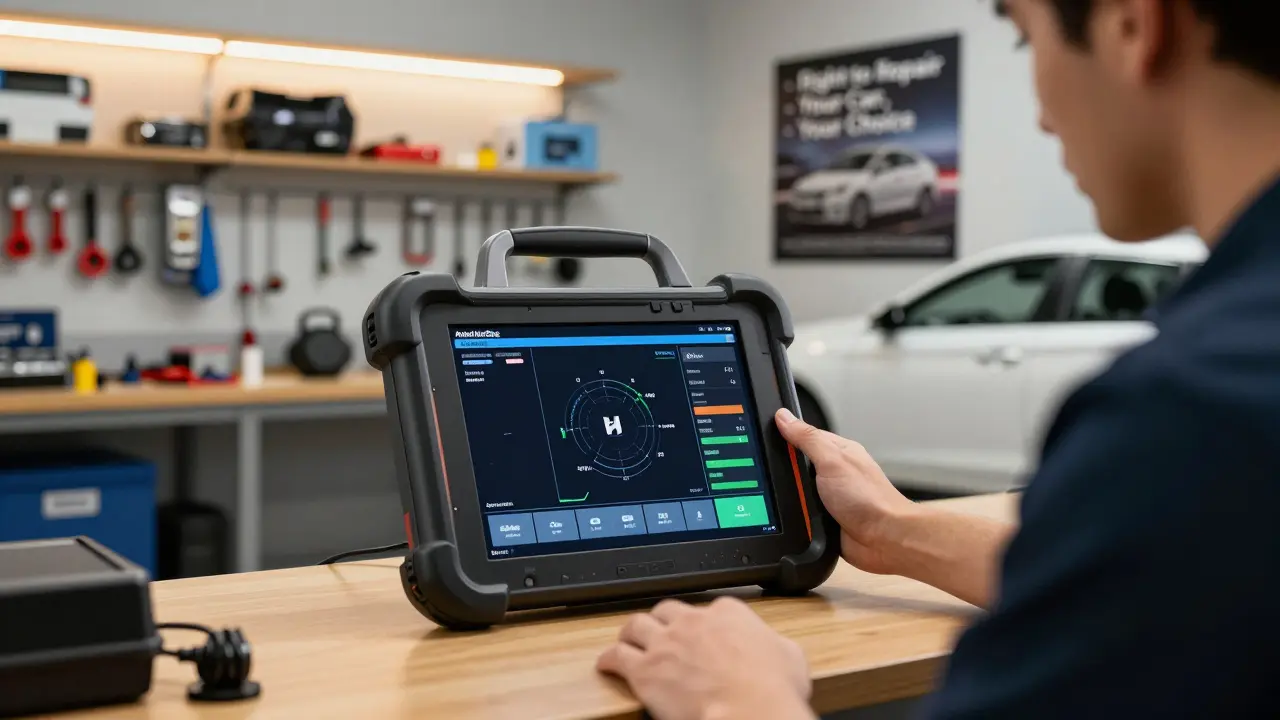
- Complex engine diagnostics that need a scanner with OEM-level software.
Knowing your limit keeps you safe and your car running smoothly.
Quick Reference Cheat Sheet
Bookmark this list for a fast glance before any project.
- Always lift the car on jack stands, never rely on a hydraulic jack alone.
- Label every hose or wire you disconnect - a photo works wonders.
- Keep a parts log: date, mileage, and serial numbers.
- Store old parts in a sealed bag; you might need them for reference.
- Dispose of fluids responsibly - most auto parts stores accept used oil and antifreeze.
How often should I replace my brake pads?
Most brake pads last between 30,000 and 70,000 miles, but you’ll know they’re wearing out when you hear a squeal, feel reduced braking power, or see the pad thickness below 3 mm.
Can I mix different brands of oil filter and oil?
Yes, as long as the oil meets the manufacturer’s specification (e.g., 5W‑30 synthetic). The filter’s role is simply to catch contaminants, so brand differences don’t matter.
What’s the safest way to test if a battery is still good?
Use a digital multimeter. A fully charged battery reads around 12.6 V at rest. If it drops below 12.0 V, it’s time for a replacement.
Do I need to replace the timing belt on a 2020 sedan?
Check the owner’s manual. Many modern cars use a timing chain that lasts the vehicle’s life, but some still have belts with intervals around 60,000‑100,000 mi.
Why does my engine sputter after changing spark plugs?
You might have a mis‑firing plug, incorrect gap, or a loose coil connection. Double‑check each plug’s torque and reinstall the coils securely.


Meredith Howard
October 22, 2025 AT 00:49When selecting a replacement part it is essential to verify the OEM part number against the vehicle identification details. This practice eliminates the guesswork that often leads to mismatched components. Additionally consult the manufacturer service bulletin can reveal known issues with specific batches. Maintaining a record of each installation date will simplify future maintenance planning.
Yashwanth Gouravajjula
November 4, 2025 AT 21:09In India many workshops trust locally‑made aftermarket parts because they balance cost and availability. However always check for ISO certification before purchase. This ensures safety without compromising budget.
Kevin Hagerty
November 18, 2025 AT 18:29Awesome another weekend lost to brake work.
Janiss McCamish
December 2, 2025 AT 15:49Replace the brake rotors only when the surface is below the minimum thickness; otherwise you’re just wasting money. Use a torque wrench to hit the exact spec – it prevents brake fade later. Always bleed the system after any caliper removal to avoid air bubbles.
Kendall Storey
December 16, 2025 AT 13:09Got my jack and stands set up, and the shop rags are ready for the oil drain. The new filter’s seal was pre‑lubed, so the install was a breeze. Remember to torque the drain plug to the manufacturer’s Nm rating – over‑tightening can strip the threads. After the fill, give the engine a quick idle to circulate oil before you hit the road.
Ashton Strong
December 30, 2025 AT 10:29Selecting quality components is one of the most critical decisions a DIY mechanic can make.
While OEM parts guarantee an exact fit, they often carry a premium price that can strain a hobbyist’s budget.
Aftermarket alternatives, when sourced from reputable manufacturers, can deliver comparable performance at a fraction of the cost.
Before purchasing, always locate the part number on the original component and cross‑reference it with the supplier’s catalog.
Websites such as RockAuto and PartsGeek provide extensive filtering options that let you narrow results by vehicle make, model, and year.
Read customer reviews carefully; a high overall rating combined with detailed feedback about fitment is a strong indicator of reliability.
If you consider a salvaged part, verify the mileage and request a short warranty to protect against premature failure.
Keep an eye out for certifications like ASE, ISO, or CE, which demonstrate that the part meets industry standards.
When you receive the component, inspect it for physical damage, rust, or missing hardware before installing.
Maintain a logbook that records the part number, purchase date, mileage at installation, and any notes on performance.
Such documentation not only helps you track service intervals but also adds value when you eventually sell the vehicle.
Remember to use the correct torque specifications during installation; a torque wrench is indispensable for this purpose.
Finally, dispose of any old fluids or consumables responsibly by taking them to a certified recycling center or an auto‑parts retailer that accepts used oil.
By following these best‑practice steps, you reduce the risk of costly mistakes and extend the life of your automobile.
Enjoy the satisfaction of a well‑executed repair while keeping your wallet happy.
Steven Hanton
January 13, 2026 AT 07:49A systematic maintenance checklist helps prevent unexpected breakdowns. Start each month by inspecting fluid levels, brake pads, and tire wear. Record observations in a spreadsheet to spot trends over time. This disciplined approach saves both time and money in the long run.
Pamela Tanner
January 27, 2026 AT 05:09When teaching a newcomer, begin with the fundamentals of tool safety and proper lifting techniques. Emphasize the importance of labeling hoses and electrical connectors before disconnection. This habit reduces errors and streamlines reassembly.
Kristina Kalolo
February 10, 2026 AT 02:29The guide’s checklist is a solid reference for routine upkeep. Refer to it before tackling any major repair to ensure you have the required tools on hand.